Two really good reasons to put your chapter meetings into LodgeMaster:
- LodgeMaster now has a Member Portal that has a calendar in it. If you enter your upcoming chapter meetings into LodgeMaster's Event module, they'll show up in that calendar.
- Attending a chapter meeting can count towards activation of a member (going to an additional event after your ordeal). Having attendance at chapter meetings tracked in LodgeMaster makes the record the lodge will need to show that the members have activated.
Creating a Chapter Meeting
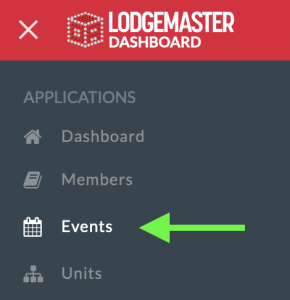
- Choose "Events" from the main menu
- Look in the list of events first to make sure it's not already there (Look in the Start column to find the date first, then in the Event column to find the name). Assuming it doesn't already exist:
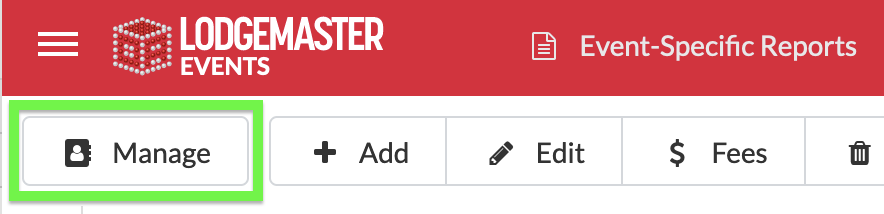
- Click Add at the top

- Reference this screenshot for the instructions below

- Fill in the event name to be something that identifies it from the other events around it, and would be meaningful when seen on the calendar in the Member Portal
- Set the Type to Chapter Meeting
- Location is an autocomplete... start typing part of the name of your location and see if it's in the list. If it is, pick it. If it's not, then clear the field out and leave it blank for now. Contact your LodgeMaster Administrator to get the location added to the list so you can use it for events. It's important to eventually get this filled in so people can tell where the meeting is when seeing it on the calendar, but you can come back and fix this later once your Administrator gets it added.
- Make sure Lodge Wide is NOT checked.
- Set Chapter to your chapter.
- Both the Start and End dates/time are required fields. Click the calendar icon on the right and pick the dates off the calendar. If you don't know how long the meeting is going to last, just guess, but it has to be entered.
- For Chapter Meetings, everything below the dates can be ignored.
- Click

- If you need to make any changes to the event, select it in the event list, and click Edit at the top.

Taking Attendance at the Meeting
- Choose "Events" from the main menu
- Look in the list of events find the meeting, and click on it to highlight it (Look in the Start column to find the date first, then in the Event column to find the name).
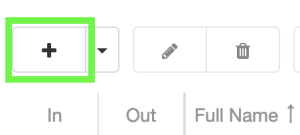
- Click Manage at the top
- Click the Add button
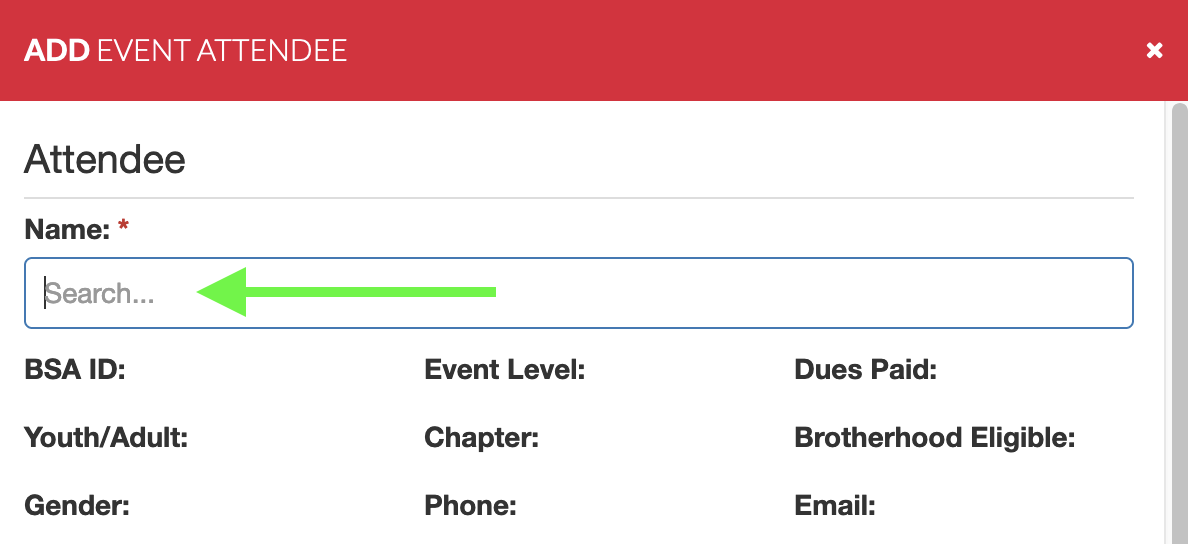
- For each attendee:
- Start typing the LAST name of the member. It should autocomplete. When they show up in the list, click on them.
- Most of the rest of the fields on this screen are only important to larger events, and you can just ignore them for Chapter Meetings.
- Scroll Down to find the Check In Date

- Click the calendar icon then click on today's date to set it.
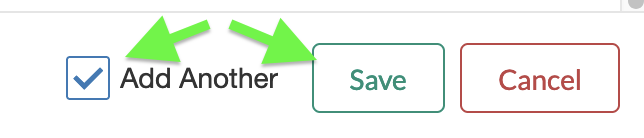
- Checkmark "Add another" then click Save.
- Repeat with each attendee as they show up.
- Start typing the LAST name of the member. It should autocomplete. When they show up in the list, click on them.
- Once you're done entering people, click the Cancel button to exit from the Add Attendee dialog.